The Complete Guide to Agave Photography Techniques | Capturing Form and Spines Beautifully
Master the techniques for beautifully photographing agave form and spines. This guide covers lighting fundamentals such as side lighting to enhance serrated edge dimension, effective shadow techniques, angles that showcase rosette forms, detailed photography of finishes and textures, background selection, and smartphone photography tips.
Key Takeaways
Master the techniques for beautifully photographing agave form and spines. This guide covers lighting fundamentals such as side lighting to enhance serrated edge dimension, effective shadow techniques, angles that showcase rosette forms, detailed photography of finishes and textures, background selection, and smartphone photography tips.
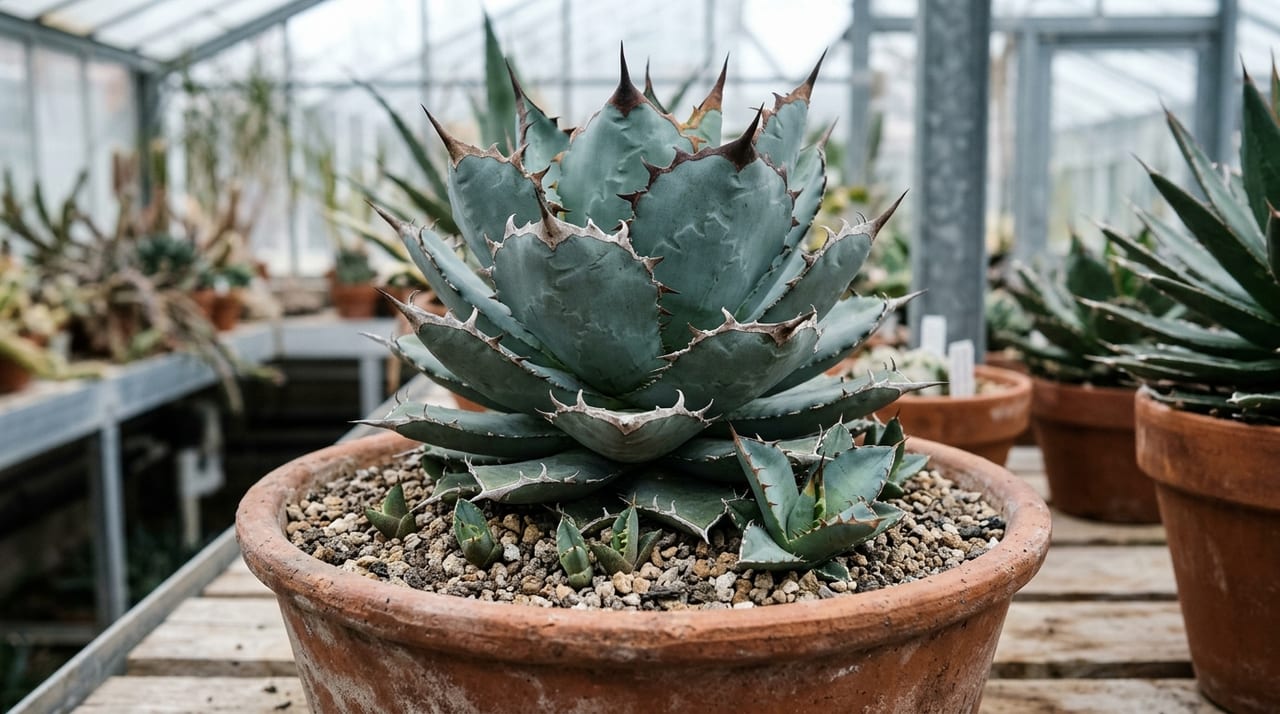
Agave's appeal lies in its powerful form, sharp serrated edges, and the sculptural beauty created by its thick leaves. Yet capturing that commanding presence in a photograph is surprisingly challenging. A single adjustment to the lighting can transform the three-dimensional impact of the serrated edges, and different angles completely change the impression of the rosette. This article explains photography techniques that maximize the beauty of agave in ways that are easy for beginners to understand.
The Basics of Lighting for Agave Photography
Lighting is the most crucial factor in determining the quality of agave photography.
- Sidelight (lighting from the side) is most powerful: Lighting from the side is the most effective for emphasizing the serrated edges and leaf texture. Shadows on the serrated edges make the three-dimensionality stand out. Morning light from an east-facing window or evening light from the west is ideal
- Overcast skies are best: Thick leaves tend to blow out highlights in direct sunlight. Soft light from a light overcast sky naturally expresses leaf color and surface texture
- Backlighting for translucency: Varieties with thinner leaves reveal beautiful leaf veins when lit from behind. Use a reflector to fill in light so the image doesn't become pure silhouette
- Avoid flash: Flat light erases three-dimensionality. If natural light isn't available, use an LED light from the side to create shadows
- Sidelight with a black background: A dramatic shot with serrated edges lit against a dark background is a go-to technique on social media
Making Shadows Your Ally
In agave photography, "shadows" are a key element that creates three-dimensionality and strength. While most plant photography avoids shadows, agave photography should embrace them.
- Shadows on the serrated edges: When each serrated edge casts a shadow with sidelight, the power and strength of agave's defining feature becomes striking. Experiment by slightly adjusting the light source angle to find the best position
- Shadows from overlapping leaves: Rosette leaves cast shadows on lower leaves below them, expressing the three-dimensional structure
- Using cast shadows: An agave silhouette stretching across a white background creates a very striking composition
- Adjusting contrast: If shadows are too dark, detail in the dark areas gets crushed. Use a reflector to soften the shadow just enough to see the details
Angles and How to Shoot Rosettes
Here are the key angles for beautiful rosette photography.
- Overhead shot (straight down): This most accurately captures the symmetrical beauty of the rosette. Perfect for species identification and growth records. A tripod makes it easier to ensure level framing
- 45-degree angle: The most versatile angle. Captures both the rosette shape and three-dimensionality of the serrated edges simultaneously, and is the standard for social media posts
- Horizontal angle (from the side): Shows leaf thickness and balance with the pot. Titanota's ball-shaped form is especially striking from the side, emphasizing its rounded profile
- Low angle: Viewing a large plant from below creates an overwhelming sense of presence. Using the sky as a backdrop also brings out the outdoor atmosphere
- Rule of thirds with negative space: Offsetting the plant from center and leaving empty space creates an artistic composition
Detail Photography of Serrated Edges, Pen Marks, and Texture
Agave's beauty extends beyond the overall form to its finest details.
- Serrated edge close-ups: Use macro photography with sidelight to make the outline of each spine stand out
- Pen mark photography: The serrated edge impressions from adjacent leaves left on agave foliage are a key point for collectors. The trick is to light from slightly above the front to minimize shadows
- Leaf surface texture: Titanota's farina or Oteroi's skin texture are revealed in slanted light that brings out the surface contours
- Top spine: The apical spine at the leaf tip expresses individual character. A clean background with sharp focus creates a beautiful image
- Emerging new growth: The moment new leaves unfold is the most exciting scene for collectors. Focus on the center and blur the outer area to draw the eye to the new growth
For macro photography, a clip-on macro lens for smartphones (roughly ¥1,000–3,000) is convenient and delivers sufficient image quality. Combine a tripod with manual focus to capture sharp, blur-free detail shots.
Background and Styling
- Black background: The classic choice for agave. Leaf color stands out and creates a luxurious finish. Perfect for collection photography
- White background: A clean, bright impression. Ideal for species introductions and sales photography
- Concrete or mortar background: A popular choice that matches agave's rugged aesthetic
- Pairing with artisan pots: Keeping favorite pots for photography dramatically improves how your images look
- Rulers or coins placed in frame: Useful for conveying size. Helpful for size comparisons on social media
For more detailed thoughts on creating backgrounds, see Agave Collection Display and Styling. When you think through composition together with shelf arrangement and pot pairing, the overall presentation of your entire collection becomes even more refined.
Smartphone Photography Techniques
- Portrait mode: Background blur emphasizes your subject. Check that serrated edges don't get lost in the blur processing
- HDR mode: In high-contrast scenes, this suppresses blown highlights and crushed blacks
- Expose slightly dark: Slightly underexposed shots bring out deeper leaf color and a more refined look
- Grid display: Horizontal and vertical guidelines help create stable compositions. Especially important for overhead shots
- Keep editing minimal: Oversaturating colors creates an unnatural look. Stick to subtle adjustments of contrast and brightness; preserve agave's natural colors
- Raw shooting: Using iPhone ProRAW or Android RAW shooting dramatically increases your editing flexibility later
To improve photo quality, the key is to shoot as many frames as possible. Shoot dozens of shots of the same plant with different lighting and angles, then select the best one. Build this habit and your skills will improve naturally.
Optimizing Your Shooting Environment and Best Times to Shoot
The ideal times for agave photography are early morning and evening (the golden hour) when the sun is at a low angle. During these times, the light is soft and naturally emphasizes the three-dimensionality of the serrated edges and rosette. Strong direct sunlight at midday creates too much contrast, leading to blown highlights and crushed blacks, so be mindful.
On overcast days, uniform light covers everything evenly, making it ideal for accurately recording color. When photographing for species identification or online sales, shooting on a cloudy day reproduces colors closer to the actual plant.
For indoor photography, place a diffuser (white thin fabric or tracing paper) at a window receiving natural light to create soft light, and you'll achieve a professional-looking result.
Find a Photogenic Agave on GrowerDirect
Agave photography isn't just about recording your collection—it's also an act of deeply observing and appreciating sculptural beauty. As you experiment with lighting and angles, you'll discover beauty you never noticed before. On GrowerDirect, you can purchase carefully selected agaves with beautiful serrated edges or remarkable pen-marked specimens directly from trusted specialist growers. Before purchase, you can confirm the real appeal of the plant through multi-angle photos. Refer to the Agave Encyclopedia for how to identify each variety, and find your perfect specimen to photograph and grow.