Complete Guide to Bonsai Photography Techniques | Composition, Lighting, and Background to Showcase Beauty
Photography guide covering how to identify the best viewing angle, select lighting, and create the right background for beautiful bonsai photos, with tips on the differences between documentation shots and social media posts.
Key Takeaways
Photography guide covering how to identify the best viewing angle, select lighting, and create the right background for beautiful bonsai photos, with tips on the differences between documentation shots and social media posts.
Related Species
Why Bonsai Photography Is Challenging and What to Know Before Reading
Bonsai is called the "art of three-dimensional form." The beauty of a single tree is only complete when elements like the angle of the trunk, the arrangement of branches, the density of leaves, and the balance with the pot come together in three dimensions. For this reason, much of that information is easily lost when trying to capture it in a flat photograph, and the type of photographic challenge is entirely different from simpler subjects like flowers or fruit.
A slight change in angle and the root spread disappears; get the backlighting direction wrong and the leaf detail is lost. For both growers and enthusiasts, it's a common experience for a tree trained over years to end up looking like nothing more than "just a potted plant" in the photograph. Conversely, if you master the basics of composition, lighting, and background, you can capture the tree's true appeal in a photograph using nothing more than a smartphone. This article breaks down those fundamentals step by step.
Identifying the Front (Best Viewing Angle)
Every bonsai has what's called a "front"—the viewing angle that best conveys the tree's appeal. Before raising your camera, pause and slowly walk around the pot, checking the following points:
- Trunk angle: A slight forward tilt creates a sense of depth and movement
- First branch spread: The angle where the thickest primary branch appears to open toward the viewer
- Root spread (root plate): Whether the roots' spread across the base is visible
- Trunk texture: Whether the texture comes through—rough bark, moss growth, and other details
The front is the angle where all these elements align naturally. Once you've identified the front, adjust your lens height to the lower-middle of the tree. Shooting from above makes the pot too prominent and diminishes the sense of upward movement in the tree form, while shooting from too low hides the base and obscures the appeal of the root spread. The basic principle is to shoot from a nearly horizontal eye level—neither looking up nor down.
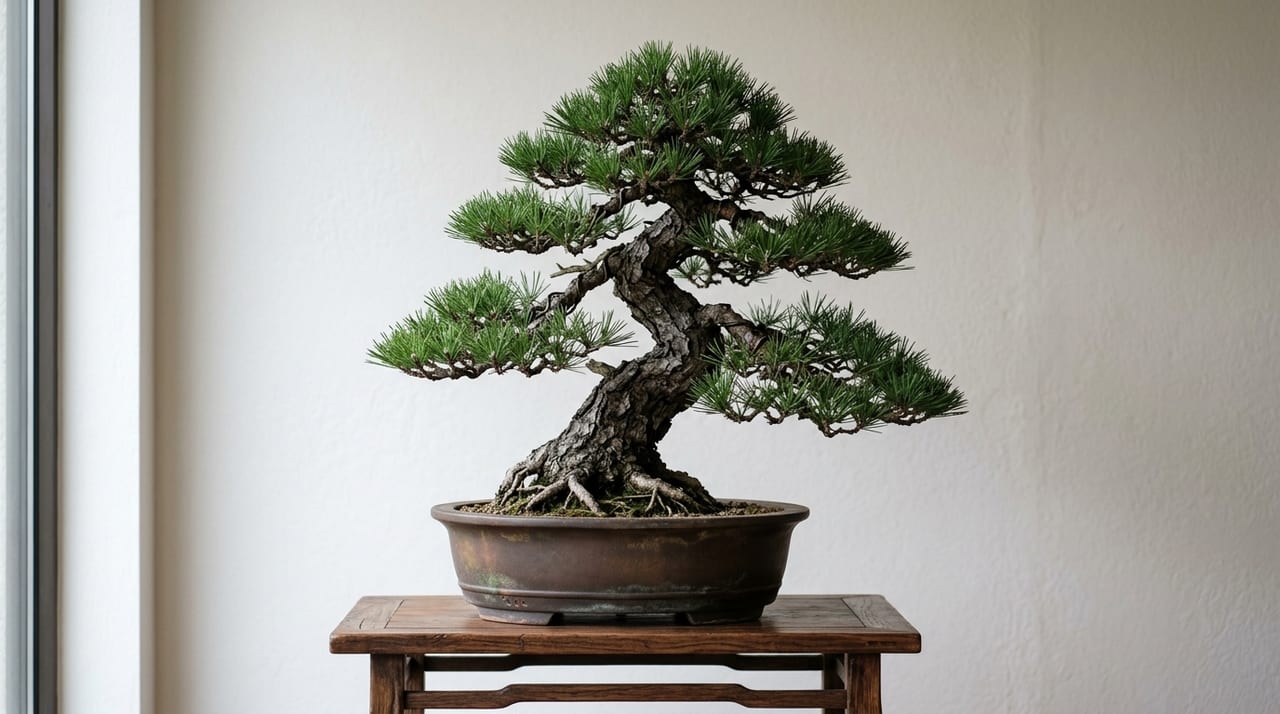
The ideal angle varies somewhat by species. Trees with delicate leaves, like Japanese maples, photograph especially beautifully during fall color when shot at a slight backlighting angle that showcases the translucency of the leaf undersides. Conifers like black pine and Japanese white pine are best captured in front or semi-backlighting, where the trunk texture and branch structure are visible.
Choosing Light—Softness Is Key
The quality of light has the greatest impact on the final result of a bonsai photograph. Strong direct sunlight on a hot summer day creates dark shadows between the leaves and flattens the texture of the trunk, while the diffused light of an overcast day or shadowed area renders the green of the leaves and flower colors with natural saturation, bringing out the details of the entire tree uniformly.
When outdoors with only direct sunlight available, using the low-angle light of early morning or late evening is the most practical approach. This creates moderate shading in the trunk's contours and brings three-dimensionality to tree forms that might otherwise appear flat. When you want to show flower color beautifully—as with azalea bonsai in bloom—avoid backlighting and instead use front or semi-front lighting to capture the petals' true color.
When shooting indoors, use natural light from a window as your main light source, and use white paper or a reflector on the opposite side to fill in shadows for a more uniform result. Direct flash can easily blow out the shine on the trunk, so it's best to avoid using it without a diffuser. Even if you can't control the light's intensity, simply being conscious of whether it's direct or diffused, and whether it's morning/evening or midday, will dramatically change the result.
Choosing Background and Display Stand
No matter how well-groomed a bonsai is, a cluttered background will compromise the overall impression of the photograph. Professional bonsai photographs typically use plain walls or solid-color backdrops to make the tree's silhouette stand out.
Here are some methods you can easily try at home:
- Fabric or paper backdrop: Simply hanging fabric in a neutral color—white, gray, deep navy—on a wall transforms the impression. Choose colors to match the tree species and season; darker gray or near-black works well for evergreen conifers, while white or pale colors complement flowering bonsai.
- Use a display stand: Placing the bonsai on a table or stand rather than directly on the ground makes the root spread more visible even at eye level, and makes it easier to hide clutter around the base of the pot.
- Blur outdoor foliage: If using outdoor greenery as a background, increasing the distance between subject and background and using a wide aperture will make the tree stand out.
Gently cleaning soil deposits from the pot's rim and tidying moss before shooting will noticeably improve the final image. Attention to these details communicates the care you take in managing the tree itself.
Practical Tips for Shooting with a Smartphone
While smartphones are convenient, be aware of wide-angle lens distortion and color shifts from automatic corrections. Simply keeping these points in mind will raise the quality of your shots.
- Display grid lines: Using horizontal and vertical reference lines lets you control the pot's tilt and trunk angle as intended
- Manually adjust exposure: When using a dark background, automatic exposure can make the main subject blow out, so tap the screen to reduce brightness
- Use Portrait Mode selectively: While background blur is effective, fine details like branch tips can be cut off unnaturally, so standard mode is safer for complex tree forms
- Use RAW on capable devices: RAW shooting gives you more flexibility to adjust white balance and exposure later, and fine-tuning color temperature brings fall colors and flowers closer to their true appearance
Shooting for Documentation vs. Social Media
Bonsai photography has two distinct purposes—documenting growth and conveying appeal—and each requires different considerations.
For documentation, fixed-point photography from the same angle, distance, and ideally the same time of day is essential. By shooting consistently under the same conditions, you can objectively compare changes in tree form, leaf density, and trunk thickness over years. Organizing your phone's photos into date-labeled folders creates a useful reference for reviewing the timing of pruning and wiring.
In contrast, photos intended for social media and other presentation require, beyond the basics of composition, lighting, and background, a conscious effort to convey the viewing experience in the image itself. Effective techniques include using depth of field to blur the background and emphasize the main subject, arranging multiple bonsai on a shelf to convey the whole aesthetic, and adding seasonal accents. For either purpose, carefully preparing the tree before shooting is the quickest path to success.
Developing an eye for photography also develops the eye of a buyer. When selecting bonsai online, you'll gain the ability to check whether the front is clearly shown, whether the root spread is visible, and whether you can discern the pot-to-tree proportion—all of which raise your satisfaction after purchase. Enjoy your time with bonsai while holding both perspectives: that of the photographer and the viewer.