Complete Guide to Aquatic Plant CO2 Systems | Practical Manual from Setup to Daily Maintenance
CO2 is an essential element for aquatic plants to perform photosynthesis. This article covers everything needed to cultivate fast-growing stem plants and red-tinted aquatic plants, from selecting CO2 injection systems, installing solenoid valve regulators, positioning diffusers, to daily maintenance.
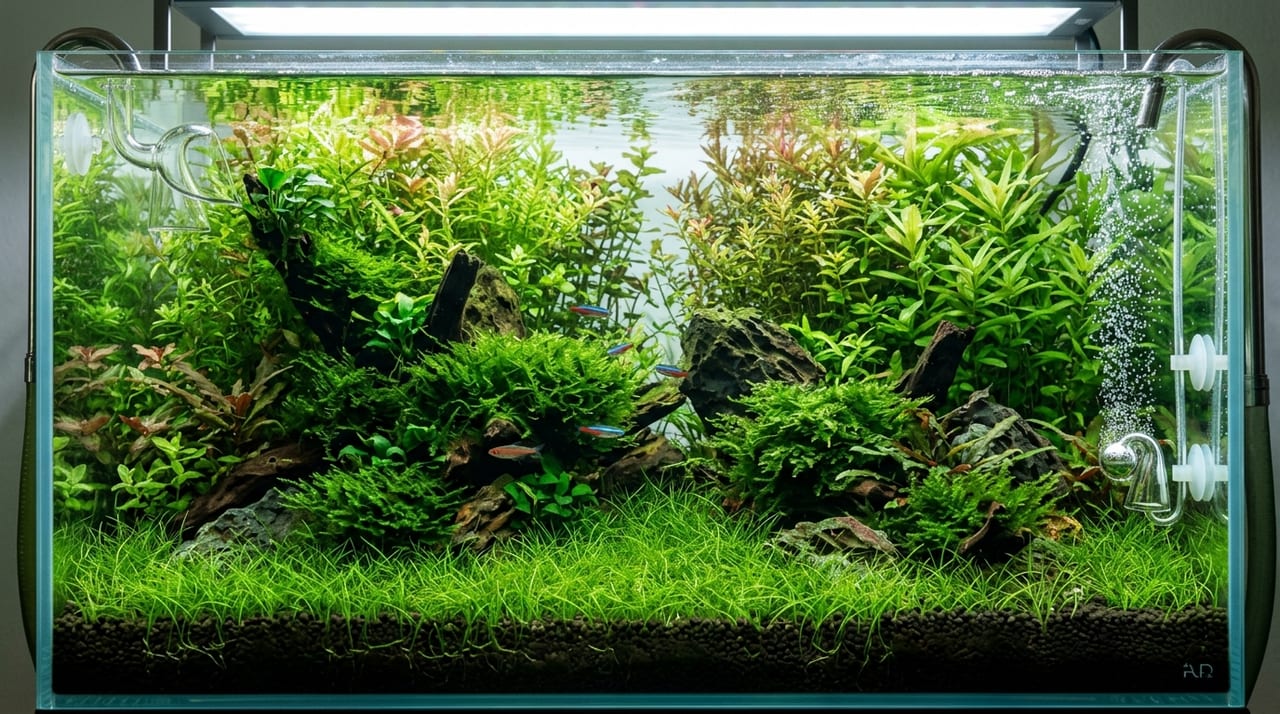
Key Takeaways
CO2 is an essential element for aquatic plants to perform photosynthesis. This article covers everything needed to cultivate fast-growing stem plants and red-tinted aquatic plants, from selecting CO2 injection systems, installing solenoid valve regulators, positioning diffusers, to daily maintenance.
The Role of CO2 in Aquatic Plant Aquariums
Aquatic plants grow through photosynthesis. Photosynthesis requires three elements: light, water, and carbon dioxide (CO2). In a closed aquarium environment, atmospheric CO2 does not dissolve sufficiently, so external CO2 injection is highly effective when cultivating fast-growing stem plants, red-tinted aquatic plants, carpeting species, and similar varieties.
When CO2 is added, aquatic plant leaves sometimes release sparkling bubbles. This is a sign that photosynthesis is occurring actively and is considered one of the beautiful sights in aquatic plant aquascaping. On the other hand, excessive CO2 injection can rapidly increase dissolved CO2 concentration in the water, risking damage to fish and crustaceans living together. Building and operating the system with correct knowledge is the first step toward maintaining a healthy aquatic plant aquarium.
Choosing a CO2 Supply Method
There are several methods to deliver CO2 to an aquarium, and the choice depends on tank size, budget, and management style.
Fermentation Method (DIY Method) This method adds CO2 generated by fermenting sugar and yeast. No specialized equipment is needed and costs are low, but CO2 generation is unstable and fermentation tends to become excessive during summer. This method is suitable for small tanks 30 cm or smaller and for practice at the beginner stage.
Small Cylinder Method This system uses disposable small cylinders such as 60g, 74g, or 95g. Many complete sets are available and installation is simple. However, running costs tend to be higher than the fermentation method, and it is easy to overlook when the cylinder is empty.
Large Cylinder (Regulator) Method This method connects a regulator (pressure controller) to large cylinders such as 1kg, 2kg, or 5kg. Injection amount can be precisely controlled and running costs are economical over the long term. For tanks 60 cm or larger and serious aquascapes with densely planted multiple species, this method provides the most stable performance.
Equipment Configuration and Selection Points
Using the large cylinder method as an example, let us review the main equipment that comprises the system.
- Cylinder: Choose one designed for aquariums. Filling pressure and safety valve specifications differ, so avoid using industrial or welding cylinders.
- Regulator (pressure reducer): A device that reduces the high pressure from the cylinder to operating pressure. Models with both primary and secondary pressure gauges (for checking remaining cylinder contents and verifying output pressure respectively) are user-friendly, and selecting one with a built-in solenoid valve enables timer control.
- Solenoid valve: A valve whose opening and closing is automatically controlled by electricity. Combined with a timer, it enables CO2 management synchronized with lighting on and off.
- Needle valve (flow control valve): A valve for fine-tuning the number of bubbles. Some models have it built into the regulator, while others are separate units.
- Pressure-resistant tubing: Piping that connects the cylinder to the diffuser. Standard silicone tubing is permeable to CO2, so CO2-specific pressure-resistant tubing is recommended.
- Diffuser: A device that converts CO2 into fine bubbles for release into the water. Ceramic diffusers produce fine bubbles consistently, while wooden diffusers offer high dissolution efficiency but require maintenance to prevent clogging.
- CO2 checker (drop checker): An indicator device that displays CO2 concentration in the tank by color. Green indicates appropriate concentration, blue indicates low, and yellow indicates excess.
Setup Procedure
Once all equipment is ready, proceed with connection and adjustment following these steps.
- Attach the regulator to the cylinder. Use the included packing at the connection point and tighten securely with tools. Seal tape should be used only when necessary for metal-to-metal connections.
- Connect pressure-resistant tubing to the regulator outlet and attach it to the diffuser in the tank. Handle tubing carefully to avoid kinking or cracking from excessive bending.
- Connect the solenoid valve's power to a timer and set it according to your lighting schedule. The standard management schedule is to begin injection 30 minutes to 1 hour before lights turn on and stop when lights turn off.
- Slowly open the cylinder valve and confirm that the primary pressure gauge rises. Apply soapy water to the connection points; if no bubbles appear, there are no leaks.
- Gradually open the needle valve until bubbles begin to appear, then determine the injection rate by visually counting the number of bubbles per second. It is important to start with a low setting and observe how the system performs.
For diffuser placement, areas where filter discharge flows or calm zones near the substrate are effective. Try different positions to find the optimal location where bubbles can reach throughout the tank.
CO2 Dosage Guidelines and Concentration Management
Appropriate CO2 injection amounts vary depending on tank size, planting density, light intensity, water temperature, and the number of inhabitants, so there is no one-size-fits-all answer. What matters is not memorizing specific numbers but gradually adjusting based on observation of plant condition and inhabitant behavior.
If the CO2 checker turns yellow or if fish are observed doing "gasping" at the water surface, this indicates excess CO2. Immediately close the needle valve and provide aeration as countermeasures.
At night, aquatic plants do not perform photosynthesis, so CO2 injection stops. If the solenoid valve is automatically controlled by a timer, the system can be safely managed even while sleeping. Additionally, as water temperature increases, CO2 dissolution decreases, so during summer either set the bubble rate slightly higher or adjust it in conjunction with tank temperature management.
Daily and Periodic Maintenance Tips
Since CO2 systems operate over the long term, regular inspection and cleaning are key to stable operation.
Daily checks
- Check that the primary pressure gauge on the cylinder has not dropped suddenly
- Confirm that bubbles are coming out normally from the diffuser
- Observe fish for any abnormal swimming behavior
Weekly (1-2 times per week) maintenance
- Check the color of the CO2 checker's indicator solution and replace the indicator as needed
- Inspect tubing and joints for dirt or cracks
Monthly maintenance
- Remove the diffuser and soak it in a citric acid solution to clear any clogs. Rinse thoroughly after soaking before returning it to the tank
- Check pressure-resistant tubing for discoloration, hardening, or cracks
- When replacing cylinders, replace seals and packing with new ones before connecting, and always perform a leak check
Once a CO2 system is set up, day-to-day maintenance is minimal, and you can feel its effectiveness through the visible growth of your aquatic plants. GrowerDirect features many aquatic plants carefully cultivated by growers. Prepare a well-equipped CO2 environment and welcome your favorite aquatic plants home.