Guide to Echeveria Hybridization and Seedling Cultivation: From Pollen Collection to Young Plant Management
Explains the methods for Echeveria cross-breeding (hybrid creation) and seedling cultivation. Covers the complete process from pollen collection and crossing procedures to seed collection and storage, sowing through germination, and seedling management—a detailed guide to creating your own original Echeveria varieties.
Key Takeaways
Explains the methods for Echeveria cross-breeding (hybrid creation) and seedling cultivation. Covers the complete process from pollen collection and crossing procedures to seed collection and storage, sowing through germination, and seedling management—a detailed guide to creating your own original Echeveria varieties.
Related Species
Why Echeveria Hybridization is Fascinating
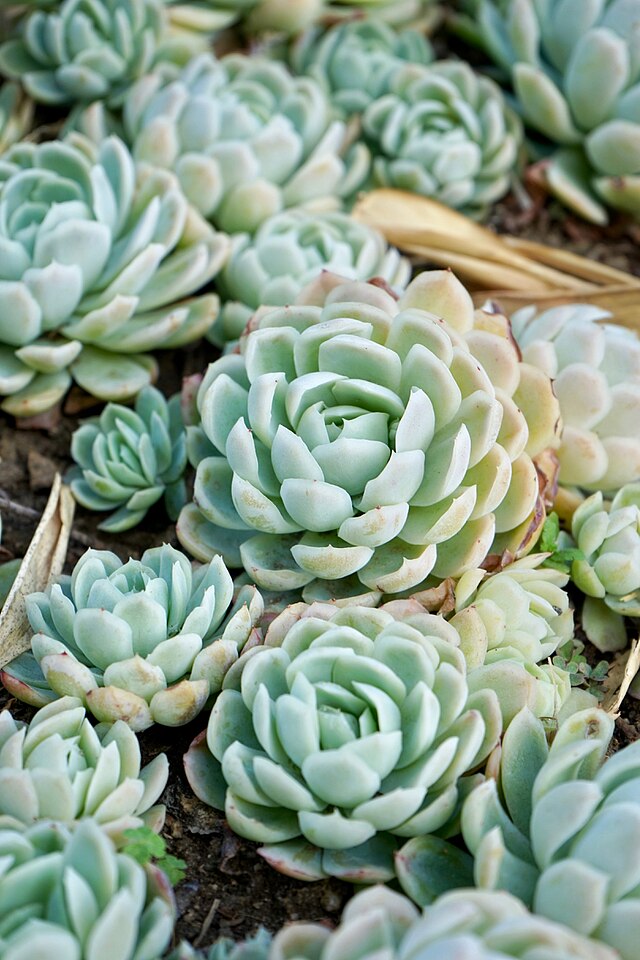
Echeveria is a classic succulent with rosette-shaped leaves, and countless hybrid varieties have been created by growers and hybridizers worldwide. The seedlings produced through cross-breeding can possess entirely different colors, forms, and textures from their parents—offering growers the unique satisfaction of "creating their own original variety."
Echeveria exhibits exceptionally high genetic diversity. Even offspring from the same parent combination show different phenotypes depending on each individual seedling. The unpredictability of how the following characteristics combine is what makes seedling cultivation so rewarding:
- Coloration at the leaf margins
- Translucent window-like patterns
- Powdery white blooming (farina)
- Glossy, waxy texture
Cross-breeding may seem difficult, but with the right timing and methods, even beginners can successfully undertake it. This article explains the practical steps in detail, from pollen collection through young plant management.
Parent Plant Selection and Pre-Flowering Preparation
Selecting parent plants: Clearly define the desired traits (color intensity, leaf thickness, rosette diameter, amount of farina), then choose healthy, vigorous individual plants. Plants carrying disease or showing excessive stretching should not be used for crossing. The mother plant (the one that will produce seeds) requires particular vigor, so select an individual with a well-developed root system.
Confirming flowering period: Echeveria typically flowers in spring to early summer (March to June), though some varieties bloom in autumn. Once the flower spike emerges, observe daily and track the flowering stage of each bloom. Since Echeveria flowers open sequentially from the bottom, a single flower spike provides opportunities for crossing over several weeks.
Tool preparation: Gather the following tools for crossing:
- Cotton swabs
- Fine detail brush (for pollen collection)
- Magnifying glass (approximately 10x magnification)
- Label stickers
- Zippered plastic bags (for seed storage)
- Tweezers
- Masking tape
A magnifying glass is essential for confirming the condition of the stamens and pistils.
Pollen Collection and Pollination
Echeveria flowers are bell-shaped with 10 stamens and 5 pistils inside. Gently peeling away the petals with your fingers makes it easier to access the flower's interior.
- Timing for pollen collection: The optimal time to collect pollen is 1–2 days after the flower opens, when the anthers have split and yellow pollen is visible. Collecting pollen during morning hours when humidity is low ensures stable quality. Touch the anthers lightly with a cotton swab or detail brush and gently wipe away the pollen. Use the collected pollen immediately or store it in a zippered bag in the refrigerator (around 5°C). With refrigeration, pollen retains viability for 3–5 days, but using it as fresh as possible is ideal.
- Pollination procedure: The stigma of the mother plant's flower becomes sticky and receptive 2–4 days after the flower opens. Confirm this condition with a magnifying glass, then gently touch the stigma with the cotton swab containing pollen. After the procedure, record on a label "mother plant name × father plant name · date." Keeping records is the most important habit in seedling cultivation.
- Cross-contamination prevention: In environments where multiple insects visit the same plant, unintended pollen may be introduced. Placing a thin net or bag over the flower spike after pollination prevents natural pollination and maintains genetic purity.
Seed Collection and Sowing Preparation
When pollination succeeds, a seed pod (capsule) containing seeds swells 3–6 weeks after the flower fades. Harvest when the pod turns brownish or tan and feels dry and papery to the touch. If harvest is delayed, the pod may split naturally and scatter seeds, so develop the habit of checking daily.
Echeveria seeds are extremely tiny, measuring 0.5–1 mm in diameter. Cracking the pod open inside a zippered bag prevents seed loss. Ideally, sow immediately after collection, but if storing, seal the seeds in an airtight container with a desiccant and keep in the refrigerator. Fresh seeds germinate more readily; germination rates drop sharply after storage exceeding one year.
Seed-sowing medium mix: Combine in the following proportions; adding a small amount of Kanuma soil balances drainage and water retention:
- Fine-grained perlite: 4
- Red volcanic soil (extra-fine): 3
- Seed-sowing soil: 3
Water thoroughly the day before sowing and let the surface dry slightly before sowing.
Germination Management and Initial Cultivation
- Sowing method: Use tweezers to place seeds one at a time carefully on the medium surface. Echeveria seeds are photophilic (light-germinating), so covering with soil is not necessary. A density of 1–2 seeds per square centimeter is a manageable guideline.
- Germination environment: Place in a covered plastic container or under plastic wrap in a bright, indirect-light location maintained at 20–25°C. Direct sunlight will cause internal temperature to rise excessively. When the medium dries, mist to maintain humidity around 70%. Germination can occur as early as 5–7 days or take up to 3–4 weeks.
- Post-germination care: Once the cotyledons have expanded, gradually open the cover to acclimate seedlings to ambient air. Rushing this acclimation causes wilting. Switching to capillary watering (placing a shallow tray of water underneath) allows even moisture distribution without damaging tender seedlings.
Selection and Transplanting of Seedlings
Two to three months after germination, the characteristic Echeveria rosette form becomes visible. During this period, traits distinct from the parent plants gradually emerge—the moment when you truly experience the joy of seedling cultivation.
- Selection criteria: Observe coloration, rosette symmetry, leaf thickness, and growth rate; prioritize growing individuals that approach your target characteristics. Conversely, identifying and removing plants with extremely slow growth or irregular form early is also important. When cultivating many individuals in limited space, regular culling concentrates effort on the best plants.
- Transplanting timing: When leaves reach 1.5–2 cm in diameter (4–6 true leaves developed), transplant into 2–2.5-inch pots. Lift carefully with the surrounding medium to avoid damaging roots and plant in fresh soil. For one week after transplanting, avoid direct sunlight and acclimate in partial shade.
Beyond seed propagation, leaf propagation, cuttings, and division offer alternative multiplication methods—choosing the right method for your goal allows efficient stock increase. Details are explained in The Complete Guide to Succulent Propagation.
The moment your own hybrid begins displaying unique colors and forms—that is the greatest joy of the Echeveria breeder. Build your records steadily and continue pursuing your ideal plant.