【Professional Tips】Succulent Propagation Techniques | Leaf Cuttings, Decapitation, Division
Professional techniques for efficiently propagating succulents. Covers tips for increasing leaf propagation success rates and decapitation procedures.
Key Takeaways
Professional techniques for efficiently propagating succulents. Covers tips for increasing leaf propagation success rates and decapitation procedures.
Related Species
Fundamentals for Successfully Propagating Succulents
One of the attractions of succulents is that they're relatively easy to propagate. If you correctly understand the three main methods—leaf cuttings, decapitation, and division—it's possible to multiply a single plant into dozens. However, without proper technique, failures are common, and you may end up killing the plants.
This article provides detailed explanations of techniques and precautions for each propagation method, based on practices used by professional growers and cultivators. Whether you're attempting to propagate succulents for the first time or are an intermediate grower looking to improve your success rate, we offer practical information. Reading our Beginner's Growing Guide alongside this article will help solidify your foundational knowledge before attempting propagation.
Propagation Fundamentals: Timing and Environment Are Critical
The most important factors in succulent propagation are "when to propagate" and "in what environment to propagate." If you get these two points wrong, your success rate will drop significantly no matter how carefully you perform the work.
Best Timing for Propagation
The optimal seasons for succulent propagation are spring (March to May) and autumn (September to November). During these periods, temperatures remain stable around 15–25°C, and plants are actively growing. Conversely, the following periods are best avoided.
- Midsummer (July to August): High heat and humidity increase the risk of rot and decay
- Midwinter (December to February): Cold temperatures significantly delay root and shoot emergence
- Rainy season (June): High humidity makes mold and rot from cut surfaces more likely
Ideal Environmental Conditions
- Temperature: Ideally 20–25°C. Below 15°C, root development slows significantly
- Light: Bright, indirect shade (avoid direct sunlight, which damages cut surfaces)
- Humidity: Lower is better. Choose a well-ventilated location
- Soil/Substrate: Use clean, well-draining material. If unsure about composition, consult our Soil Selection Guide
Leaf Cuttings: The Most Popular Propagation Method
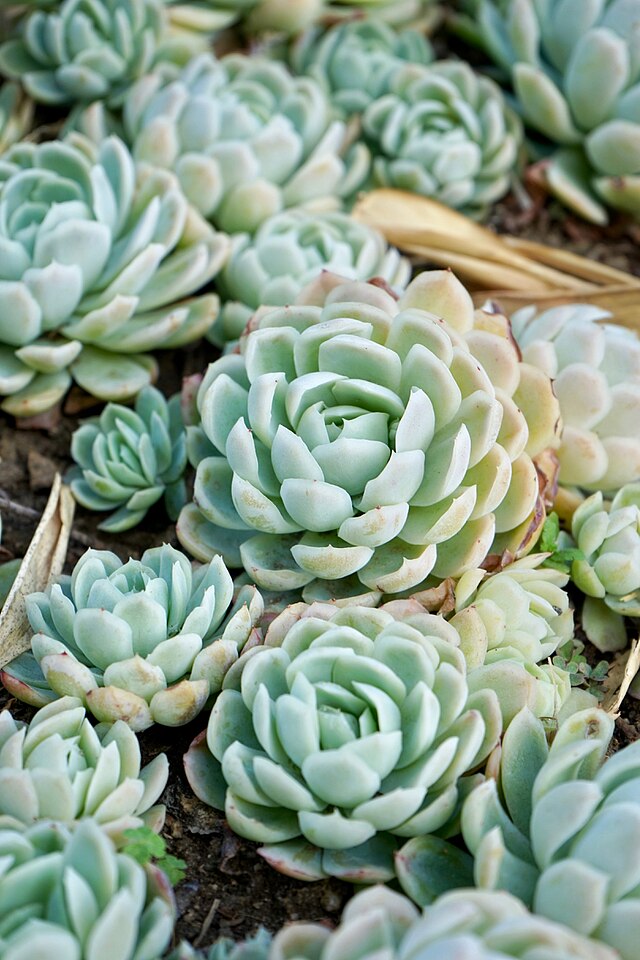
Leaf propagation involves removing a single leaf and placing it on soil to grow a new plant. It's particularly effective for Crassulaceae succulents like Echeveria and Graptopetalum, and with practice you can maintain high success rates. For those wanting deeper technical knowledge, our Complete Leaf Propagation Guide is also helpful.
How to Remove Leaves
How you remove the leaf is the first critical factor determining success or failure.
- Hold the base of the leaf as close as possible to where it attaches to the stem
- Gently rock the leaf side to side, then snap it cleanly at the base
- If the leaf breaks midway or the base tissue doesn't cleanly separate, failure is likely
The "growth point" at the base must remain intact—this is non-negotiable. A leaf torn partway will never root or sprout, no matter how well you care for it. Before removing leaves, also confirm that the mother plant is well-hydrated (firm and plump).
Drying, Rooting, and Management Steps
| Step | Action | Key Points |
|---|---|---|
| Drying | Place removed leaves cut-side up for 1–2 days | Avoid direct sunlight and high humidity |
| Placement on Soil | Lay leaves on top of vermiculite or fine red volcanic ash | Place on top of soil, not buried |
| Waiting for Roots | No watering needed. Simply wait | Roots begin appearing in 2–4 weeks |
| After Sprouting | Once small shoots appear, mist lightly | Remove the parent leaf when it begins to wither |
| Potting Up | Transfer to a small pot once shoots reach 1–2 cm | Switch to regular care from this stage onward |
Best Substrates for Leaf Propagation
- Vermiculite alone: Clean, retains moisture well, and has high rooting rates
- Fine red volcanic ash: Excellent drainage and aeration, resistant to rot
- Commercial succulent soil mix: Easy for beginners to use, though slightly heavy for dedicated leaf propagation
Decapitation: Reshaping While Multiplying
Decapitation (cutting the stem) is effective for leggy plants or those with dead lower leaves and excessively long stems. This technique allows you to reshape the plant while propagating it simultaneously—a win-win approach. If you want to prevent legginess in the first place, we also recommend reviewing light management in our Light & Lighting Guide.
Decapitation Steps
- Prepare tools: Disinfect your knife or scissors with alcohol. Using clean tools prevents pathogenic infection at the cut site
- Cut: Make a single clean cut. Sawing back and forth damages tissue, so avoid that
- Dry (upper portion): Let the cut surface of the upper part dry in bright, indirect shade for 2–3 days
- Insert (upper portion): After drying, lightly apply rooting hormone to the cut and insert into succulent soil. Withhold water for the first 2 weeks after insertion
- Manage lower portion: Leave the remaining lower portion in its original pot. Multiple offsets will shoot from around the cut site
- Separate offsets: Once offsets reach 2–3 cm, remove them with roots and establish them separately
Decapitation Precautions
- Avoid during the rainy season or midsummer, as cut surfaces rot easily
- Never water until the cut surface is completely dry
- Retain at least 3–4 leaves on the lower portion (too few leaves reduce offset production)
Division: A Reliable Method for Immediate Establishment
Division involves separating naturally occurring offsets from the mother plant and establishing them independently. It has a higher success rate than leaf propagation or decapitation, making it ideal for beginners.
Timing for Division
Separate offsets once they reach about one-third the size of the mother plant. Offsets that are too small are difficult to manage independently and have a high risk of dying.
Division Steps
- Remove the mother plant from its pot and gently loosen the root ball
- Use scissors to cut the thin stem (stolon) connecting the offset to the mother plant
- If the offset has roots, transfer it directly to a new pot
- If the offset lacks roots, dry the cut for 2–3 days before inserting into soil
- Withhold water for 1 week after planting to allow roots to establish
Post-Division Management
- Immediately after planting, keep in bright, indirect shade to avoid direct sunlight
- Begin light watering after 1 week, transitioning to regular care over 2–3 weeks
- Once roots establish, leaves will firm up, which signals recovery
Propagation Calendar and Annual Schedule
To propagate succulents systematically, understand this annual work schedule.
| Period | Recommended Tasks | Notes |
|---|---|---|
| March–April | Ideal time for leaf propagation, decapitation, and division | Watch for late frosts |
| May | Final spring repotting and completion of propagation work | Establish roots before rainy season |
| June | Avoid propagation | High humidity, major rot risk |
| July–August | Essentially a rest period | Provide shade and reduce watering |
| September–October | Prime autumn propagation window; second-best season after spring | Take advantage of temperature swings |
| November | Complete propagation work if possible | Prepare for temperature decline |
| December–February | Generally cease propagation | Focus on maintenance and observation |
Summary: Timing and Drying Are Key to Succulent Propagation
There are two points I want to repeatedly emphasize about succulent propagation.
① Work at the right time Concentrating your work during stable spring and autumn weather significantly reduces the risk of failure. You also need the courage to completely avoid propagation during summer, winter, and the rainy season.
② Thoroughly dry cut surfaces Whether you're doing leaf propagation, decapitation, or division, the same rule applies: "dry the cut before proceeding to the next step." Rushing to water or insert into soil immediately is the most common cause of rot.
Part of the appeal of succulents is the joy of propagating them. Please use this article as a reference and try propagation this season. You'll discover the pleasure of nurturing the multiplied plants and sharing them with friends. For more advanced techniques, see our Advanced Propagation Guide.
GrowerDirect offers succulents cultivated by dedicated growers nationwide, sold directly to you. Discover rare varieties and beautifully arranged collections that are hard to find in shops. You can easily ask growers questions and seek advice, making GrowerDirect the perfect place to source your first plant before attempting propagation.