Adenium Root Development Management Complete Manual | How to Ensure Bare-root Plants Develop Roots
Complete manual for rooting bare-root Adenium (Desert Rose) and imported plants. Detailed explanation of environment setup for root development management, soil selection, how to use heat mats, watering timing, and how to confirm root development.
Key Takeaways
Complete manual for rooting bare-root Adenium (Desert Rose) and imported plants. Detailed explanation of environment setup for root development management, soil selection, how to use heat mats, watering timing, and how to confirm root development.
Related Species
Conclusion: Key Points for Adenium Root Development (3 Essentials to Grasp First)
The essentials for ensuring bare-root (rootless) Adenium develops roots can be condensed into these 3 points.
- Keep the root base at 25–30°C — the largest factor determining root development. Using a heat mat significantly increases the success rate (below 20°C, root development becomes extremely slow).
- Manage in well-draining soil kept "on the dry side" — using volcanic soil or pumice alone is the basic approach. Excessive moisture is the biggest cause of rot in rootless plants.
- Resist the urge to check, and wait 1–3 months — at optimal temperatures, 3–6 weeks; at around 20°C, 2–4 months is the guideline. Emergence of new growth and stability of the plant are signs that roots have developed.
The optimal time to begin root development management is early to mid-summer (around June–August), when the growing season starts and temperatures become high and stable. During this period, root development proceeds more easily even without heating equipment, reducing failures. Conversely, beginning in autumn or later when temperatures drop requires heating with a heat mat to be virtually essential.
Below, we explain in order: supplies, environment setup, procedures, and troubleshooting.
What is Adenium Root Development Management?
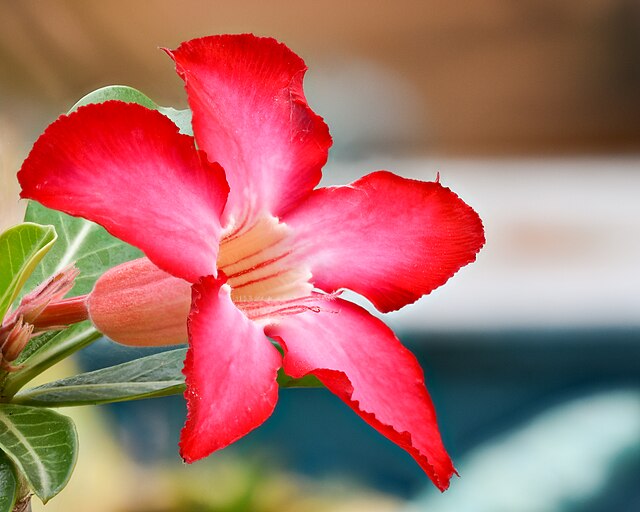
Adenium (Adenium obesum and related species), also called the "Desert Rose," is a caudex plant prized for its distinctive root system and beautiful flowers. When purchasing imported or bare-root (rootless) plants, the first step is "root development management."
Root development management is the process of encouraging new roots to grow on rootless plants. Adenium is relatively easy to root, but without proper conditions, rooting can take a long time or, in the worst case, result in rot.
Preparation Before Root Development Management
What You Need
| Item | Recommended Product | Purpose |
|---|---|---|
| Heat mat | With temperature control | Keep root base at 25–30°C |
| Soil | Volcanic soil alone or pumice alone | Prioritize drainage |
| Pot | Black plastic pot (2–3 size) | Lightweight, warms easily |
| Root promoter | Rooton or Oxyberon (indole-3-butyric acid) | Promote root development |
| Thermometer | Digital thermohygrometer | Environmental monitoring |
Check Plant Condition
Before beginning root development management, check the plant condition.
Signs of Good Condition:
- Root base and stem are firm and turgid
- Cut root surfaces are white to greenish
- Stem skin has few wrinkles (adequate moisture retention)
Signs Requiring Attention:
- Root base or stem is soft, indenting when pressed (possible rot)
- Cut surfaces are discolored brown
- Strong unpleasant odor
If rot is suspected, cut away affected tissue down to healthy tissue before beginning root development management.
Environment Setup
Temperature Management (Most Important)
In Adenium root development, temperature is the most important factor.
Ideal root-base temperature: 25–30°C
- Below 20°C, root development becomes extremely slow
- 30–33°C produces the fastest rooting rate
- Above 35°C, risk of heat damage; avoid
When using a heat mat, placing a pot directly on the mat can cause excessive heat. Insert a towel or magazine to regulate temperature.
Light Environment
Rootless plants have limited photosynthetic capacity, so avoid direct sunlight and manage in bright shade to indirect light.
- Bright indoor windowsill (east to south-facing)
- Outdoor location with 50–70% shade cloth
Gradually increase light as leaves unfold.
Humidity
High humidity helps maintain stem moisture, but excessive moisture causes rot. Manage for 50–70% humidity.
Root Development Management Procedure
Step 1: Cut Surface Treatment
- Lightly slice the cut root surface with a clean blade or scissors a few mm to expose fresh tissue
- Check the cut surface for discoloration (Benlate (benomyl) has no registration for flowers and ornamental foliage plants including Adenium; the dilution for soaking roots is not specified on the label, so protect the cut by drying rather than soaking in fungicide)
- Dry in a well-ventilated location for 1–2 days
Step 2: Root Promoter Application (Optional)
Lightly dust the cut surface with Rooton (powder) or apply Oxyberon (liquid) to increase rooting rate. Per the label, for cuttings of flowers and ornamental foliage plants, soak the base in a 200–400× dilution of Oxyberon for 12–24 hours.
Step 3: Soil and Pot
Soil Selection:
- Volcanic soil (fine grain) 100% is simplest with fewest failures
- Pumice (fine grain) 100% is also possible
- Do not use fired clay or leaf mold during root development management (organic matter increases rot risk)
Pot Size: Smaller pots are easier to manage when rootless. Choose a 2–3 size pot slightly smaller than the plant.
Step 4: Planting
- Fill the pot with soil and place the plant upright (do not plant deeply)
- Position so the base of the caudex is level with or just barely buried in the soil
- Lightly secure with wire or a stake until roots establish (until then, it may wobble)
Step 5: Begin Management
Watering Approach:
There are two approaches to watering during root development management.
Method A: Dry Management (Low risk, takes longer)
- Keep completely dry for 2–3 weeks after planting
- Then water sparingly about once weekly
- Encouraging the plant to seek water is said to promote rooting
Method B: Moderate Watering (more common)
- Keep dry for 3–5 days after planting
- Then water sparingly after soil completely dries
- Wet the top 1–2 cm of soil surface
Soil dries faster when using a heat mat, so check more frequently.
Source: MAFF Pesticide Registration Database (Oxyberon Liquid)
How to Confirm Root Development
Timeline Guide
Adenium generally develops roots in 1–3 months, depending on management conditions.
| Temperature | Rooting Timeline |
|---|---|
| ~30°C (optimal) | 3–6 weeks |
| ~25°C | 6–10 weeks |
| ~20°C | 2–4 months |
Signs of Root Development
You can infer rooting from these signs without seeing roots directly.
- New Growth: If leaves or new shoots begin to unfold vigorously, roots have almost certainly developed
- Plant Stability: A previously wobbly plant becomes stable
- Return of Firmness: The stem becomes turgid again as it can absorb water
- Roots Emerging from Pot Bottom: Most certain sign
Avoid uprooting to check whenever possible. There is risk of damaging developing fine roots.
Common Failures and Solutions
Failure 1: Rot
Cause: Overwatering, poor ventilation, low temperature Solution: Cut away rot to healthy tissue → treat with fungicide → dry → restart
Failure 2: No Rooting (3+ Months)
Cause: Low temperature, dried or sealed cut surface, weak plant Solution: Increase temperature with heat mat / re-slice the cut / try soaking in Oxyberon
Failure 3: Shriveling
Cause: Without roots, the plant cannot absorb water Solution: Mist the stem directly with water (1–2 times weekly) / repot into pre-soaked soil
Post-Rooting Management
Once rooting is confirmed, gradually transition to normal care.
- Change Soil: From volcanic soil alone to a blend with fired clay and leaf mold
- Increase Watering: Transition to normal care—water thoroughly when soil dries
- Begin Fertilizing: After 1–2 months of rooting, start dilute liquid fertilizer (around 1000×)
- Gradually Increase Light: Acclimate gradually to direct sunlight
Summary
Adenium root development management hinges on three elements: "temperature," "drainage," and "patience." Maintaining a root-base temperature of 25–30°C and managing in well-draining soil will result in rooting for most plants within 1–3 months. The path to success lies in resisting the urge to check by uprooting and avoiding overwatering—just wait patiently. Once rooted, Adenium plants can be enjoyed for years as regular top performers on the popular caudex plant ranking.
Frequently Asked Questions (Root Development Management FAQ)
Q. What is the best season to begin root development management?
Early to mid-summer (around June–August), when temperatures are high and stable, is optimal. During this period, adequate root-base temperature is easy to maintain even without heating, and rooting proceeds smoothly. Beginning in autumn through spring virtually requires heating with a heat mat.
Q. How long does rooting take?
At ~30°C root-base temperature, 3–6 weeks; at ~25°C, 6–10 weeks; at ~20°C, 2–4 months is the guideline. A 10°C difference can nearly double the time, so temperature control is crucial to success.
Q. Can you confirm rooting without uprooting?
Yes. If new shoots or leaves begin to unfold vigorously, rooting is almost certain. A previously unstable plant becoming stable and the stem regaining firmness are also signs of rooting. If roots are visible at the pot bottom, it is certain. Avoid uprooting to check, as you risk damaging developing fine roots.
Q. The stem is becoming wrinkled. Is it a failure?
Not necessarily a failure. It is often a temporary condition caused by the rootless plant's inability to absorb water, and recovery is common once roots develop. However, if the root base is soft and indented, it is a sign of rot; cut back to healthy tissue and restart.
Q. Is a root promoter necessary?
Not essential. Adenium is relatively easy to root and will develop roots without Rooton or Oxyberon if proper temperature and drainage are maintained. They can be used to boost overall rooting rate and speed, but are not required.
Related Articles
- Pachypodium vs. Adenium: Differences and Selection Guide — Comparing two major caudex plants with similar rooting principles
- Adenium Popular Variety Ranking — List of flower colors and varieties to choose from after rooting
- Pachypodium & Adenium Root Rot Recovery Manual — For root rot problems during root development management
- Adenium Grafting Guide — How to graft to accelerate flowering